
In this week’s episode of The Shutter Button Podcast, I talk about the benefits of photowalks, why you should practice going on them, and also some of my experiences and the lessons I’ve learned when shooting my own work. Enjoy and, as always, thanks for listening!
A Short Introduction to Focus Stacking
Hey everybody! Zig here!
Today I’d like to showcase an image I took on my recent trip to Mianus River Park and talk a bit about my process of retouching and focus stacking when shooting macro photography. It all starts out with a series of images and in this case, it’s a series of photographs I captured of a mushroom which I found growing on the side of a fallen log. Take a look at the images and notice how each has a different portion of the mushroom in focus, starting from the foremost edge of the mushroom and moving all the way to the back.


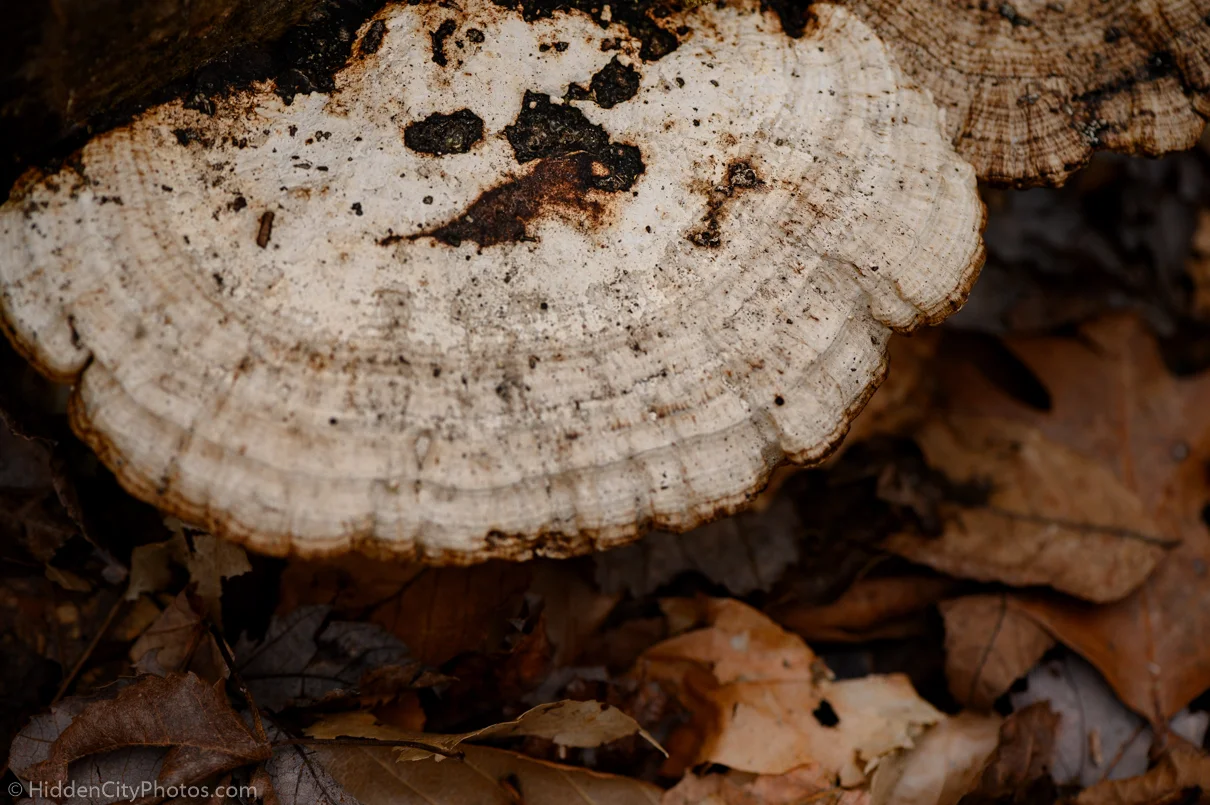
To capture these, I mounted my Nikon Z6 on a tripod, composited the image, and then used the “Focus Shift” feature that is built into the Nikon Z6. The way that focus stacking works is that focus on the foremost part of the object you want to photograph, take a photo, move the focus towards to the back while overlapping your first photograph slightly, and then repeating the process until you have captured enough “slices” that each contain a different piece of focus for the target image. The focus shift feature in the Nikon Z6 automates this process and made it very quick and easy to get the results that I wanted.
After I’ve taken the photos, I import everything into Lightroom and make all my processing adjustments to every image in the stack before exporting the full-sized JPEG files and opening them in Photoshop. What I specifically do is open the first image in the stack in Photoshop and then import and rasterize every other image in the stack into that same session. At this point, my layers look a bit like this;
After this step, I select every layer in the layers tab and click on Edit > Auto-Align Layers and then choose to let Photoshop decide on the best way to automatically align them.
Once Photoshop aligns every layer, I then go in and make any additional adjustments like the selective removal of focus from some of the layers or, if there are many images in the stack, more extremely out-of-focus areas to prevent potential ghosting when I merge everything in the next step. After I’m content with the layers in the stack, I then click Edit > Auto-Blend Layers and let Photoshop automatically merge everything together. The final image looks like this, with the expected result being that everything is in focus.
This is a bit of a simplified breakdown of my process, but I hope that it gives the structure you would need to be able to repeat a similar process or implement it into your own workflow. I am always adjusting and improving the process as I learn some of the pit-falls of shooting macro photography and I am always open to hearing suggestions about how you might change or alter this style of processing and stacking!
I’ve only recently started to integrate this technique into my routine and I’ve already seen examples of photos where I would not want to keep everything in focus. However I think that focus stacking, and practicing taking multiple images with different depths of field, allows me to have the freedom and control I’m looking to get with my macro photography. It helps me capture the crisp, sharp edges that I like, as well as selectively keep things out-of-focus when I want to. Anyway, that’s all I have for today. I hope you have a great week shooting and I also hope that I was able to give a little insight into how I produce some of my macro images. I’ll see you all next week in another episode of the Shutter Button Podcast where I’ll be talking about formal education vs. deliberate practice, and my experience with finding a balance between both.
Thanks and all the best,
- Zig
Buying New Equipment (And the Dangers of Upgrade Hype!)
Hey everyone, what’s up? Zig here with another brief weekly update!
How’s it goin’? How’s your holiday season coming along? Mine is…coming together! Things are a little rushed, but at least I’ve finished all my holiday shopping and I just need to wrap a few more gifts. I recently purchased a Nikon Z6 and wanted to briefly talk about my reasons for upgrading (from a Nikon D5500), as well as talk about something important that comes up around this time of year; upgrading.
So, I recently pre-ordered a new Nikon Z6 mirrorless camera body (and an FTZ lens adapter) from B&H photo video as an upgrade from my current Nikon D5500 body and it finally arrived! I’m incredibly excited about upgrading, but I wanted to share a few of the reasons behind my ultimate decision of picking this specific camera body and why I even considered upgrading at all;
First, there’s one immediate difference between these two bodies besides the price; the sensor. The Nikon D5500 has a 24.2MP (megapixel) DX-Format (cropped) sensor. The DX is an important thing to note because a DX-Format sensor limits you to a smaller scene when you’re shooting. It crops your scene and forces you to put more distance between you and your subject in order to fill the frame which has been a hassle for me to handle in the past. The Nikon Z6, on the other hand, has a full-frame FX-Format (uncropped) 24.5MP CMOS sensor. Because of this, I don’t have to work around my camera body as much anymore and I’m able to fill the frame much more easily when I’m out shooting. There’s a lot less respositioning and movement on my part which becomes a lot more noticeable when you’re out shooting all day long. The sensor is also newer with multiple improvements to autofocusing, which I have definitely seen in action with my own test shots.
Another major advantage of upgrading to the Z6 is its software capabilities. It definitely beats the D5500 when it comes to doing more for me. For instance, it has a focus stacking mode which is incredibly useful for shooting two of my favorite styles of photography; macro and landscapes. The settings and configuration menus provide much more control over what the camera does compared to the D5500, as well, but that lends itself to the fact that the Z6 is an overall much more feature-packed camera compared to the D5500. Some more things I like about the Z6 is the body itself. It’s weather-sealed, has in-body stabliziation, has a touchscreen, is relatively light compared to most high-end DSLRs, has a very comfortable grip, and last, but certainly not least has an EVF (electronic viewfinder) which is an absolutely incredible tool to use. It has many more dials and programmable buttons compared to the D5500, as well, but as of right now, I’m not sure what features I’d like to program in to those for quick access.
Now, I’ve been listing a ton of things I like about the Z6 compared to the D5500, but there was something else I wanted to bring up in this post that I think a lot of photographers, especially me, struggle with whenever camera manufacturers release a new line of equipment. I call that something Upgrade Hype. Upgrade Hype is when you start seeing the marketing posts from companies like Nikon and Sony and Canon as they show off all their new tech and ultra-crisp promo footage and I get it. It’s really fun to see the cutting-edge equipment come out onto the market, but it can definitely be dangerous if you’re not in a position to spend a ton of money on new equipment or if you’re not really in a spot where you need to upgrade at all. For me, I was definitely debating whether or not I really needed to upgrade, and to be perfectly honest, I don’t think I did. I definitely wanted to for a number of reasons, but I could have continued shooting with my D5500 kit and done just as well with the subjects I’m currently shooting. However, I did heavily consider the fact that this new body could help enhance those types of shots, as well as open up new opportunities for me to learn and experiment with. So while it wasn’t a necessity for me to have a new mirrorless camera, it definitely has its benefits. It also makes shooting more enjoyable since I have a bit more creative control over the final shot without having to make too many adjustments via editing after a shoot. One thing I should mention, however, is that I was also in a very fortunate situation where I had a bunch of credit with the store that I had won in an online giveaway so that definitely influenced my decision in regards to when I was going to upgrade.
In the end, I think it’s just a good idea to calmly assess whether or not you need or even can afford to upgrade whenever new gear gets released. It’s important to do this with any big purchase, but it’s especially important when you’re in a market where “the next big thing” gets announced and released every few months. It’s an easy way to spend everything on new baseline gear when you could be using that money to outfit your current setup.
Anyway, I realize this post might read very rant-y, but I hope it definitely is something you think about before making a large purchase. For me, personally, I can’t see myself upgrading for quite some time. I will be focusing on acquiring new lenses and lighting equipment, but in terms of camera bodies, I think I’ll be set for a large chunk of the foreseeable future.
What about you guys? How do you approach the idea of buying new equipment? Do you like staying on the cutting-edge of the tech or do you prefer sticking with the tried-and-true methods you already use? Let me know in the comments, and as always, thanks so much for all of your support!
- Zig

High Line, New York, New York - October, 2018
A Short Introduction to Macro Photography
Hey everybody! It’s been some time since I’ve written a post! Major apologies, I hope to be doing them a little less infrequently and with more purpose so I’m looking forward to your comments in the coming months.
I’m writing today to talk to you about something I’ve been very passionate about in the last year or so, but I haven’t had the time or the platform to bring it up. That something is macro photography.
You may be thinking, “What exactly is macro photography? :thinking-emoji:” Well, you’ll be disappointed to hear that I won’t be going over any definitions, specifics, or technicalities in this post. Instead, I just want to touch on a few things to help showcase my ideas about macro photography. Please understand, that with photography (and any art form for that matter), views on a particular style/medium will vary greatly between artists and creators, so please don’t take this as the end all, be all of macro. Now, with that brief disclaimer out of the way, let’s dig in!
Macro in a Nutshell (Literally?)
So, let’s go back to that original question you might have had; “What exactly is macro photography?” Well, to keep it brief and easy to digest, let’s just say that macro photography is when we take a photograph of something veeeeery tiny and magnify it many times using special equipment. In even shorter terms, we zoom in…A LOT.
Styles, Subjects, and Standing Still
If you take a moment to look up the terms “Macro Photography” on Google images (or your preferred image-lookup service), you will be treated with a smörgåsbord of the more popular styles and subjects of macro photography. Things like; insects, flowers, and water droplets dominate the commercial scene. This is not everything that macro photography is or should be, but it’s good be acquainted with what types of work people get paid for. At the end of this post, I’ll describe the type of macro photography I practice and go over some of the styles I personally prefer, but for now, let’s just stick to what’s really popular in the macro world.
So we’ve seen a few examples of the two biggies; insects and flowers. Why do these two dominate the macro genre? I can think of a few good reasons, but I think everybody enjoys them for different reasons. Personally, I don’t think insects typically elicit an aura of personality, but when they’re scaled up, edited, and made the focus of a beautifully composited photograph, we are treated to an inside look at a story set in a world we rarely ever get to see. We get to see textures and colors of the world around us that we pass by on an everyday basis. We get to look into the eyes of a spider on its web, waiting to catch its prey. We can watch a group of worker ants hauling chunks of food back to their anthill. We see droplets of fresh, morning dew, glistening on the back of a rhinoceros beetle. These are all picturesque, interesting subects and I genuinely think that they are so popular because people love to get glimpses of the hidden worlds and stories all around us.
Fun fact: That’s actually why my brand is called “Hidden City Photos.” When I go out shooting in New York City, especially with the intent to capture some macro photographs, I look for all of the hidden, easily missable stories scattered across the sidewalk.
Now, insects are all and good, but what about flowers? Sure, they’re beautiful, but is that it? Yes and no. I think that flowers are one of the biggest macro subjects because of similar reasons as insects; they’re beautiful and we often don’t get a chance to really stop and look at them. You know that old, cheesy saying, “You need to learn to stop and smell the flowers.”? Macro photography gives people that chance to stop and, while they can’t actually sniff the flowers, they can at least see all the beautiful texture, symmetry, and color that macro photography can bring out of even the most bland houseplants. Floral photography is also a bit impersonal, but makes beautiful decor, which is a great selling point for clients looking to buy prints to hang on their walls or office spaces. Keep that in mind as you’re shooting to help pick subjects and styles that will appeal to a larger audience of buyers.
There’s also something that I hadn’t brought up yet, but it applies to many aspects of macro photography, as well as art in general. People love nature. It’s in our nature to stand in awe of sweeping vistas and decorate ourselves in floral patterns. Our connection to nature is an important one, and exercising that connection in different ways is a key part of being who we are. Macro photography (and specifically with natural subjects) is just another way of expressing that connection. Take some time to plug in different keywords in your image search and browse around to see what other popular styles and subjects of macro shooting are. I think this is a great exercise to help develop your own taste and style because you will instinctively start picking out the specific pieces of photographs that you like and might want to bring into your own work.
Abstract Adventures
So, we’ve talked a bit about what macro is and what’s popular in the market right now, but I haven’t really spoken too much about the macro photography I do! I personally LOVE abstract and fine art photography. To be a bit more specific and down-to-earth, I love geometry, shapes, shadows, and interesting lighting. On a subject-level, I enjoy seeing architecture, urban scenes, and industrial textures. These are just a few of the things I try to keep an eye out for when I’m doing a day of shooting, but I think they’re the most important ones to watch for. There are subtler things that are easy to miss, but I think if you’ve got an eye on the lighting sitution and you’re constantly looking for new subjects, then you’ll be able to produce a wide variety of photographs you can take back home with you.
You can view a small, active portfolio here to see some samples of my own work.
My workflow usually involves five steps;
Scouting
Picking a location to work with for the day, as well as any specific subjects I might want to pay extra attention to.
Shooting
I usually approach each subject indvidually and work with it using various angles/viewpoints/etc. before moving on to the next.
Processing
This is the importing/metadata/flagging step, which I will be talking about at a future date when I talk about Lightroom and its various workflows.
Editing
This is very subjective and I approach every photograph differently, but generally I will go through all of the photos I’ve picked and adjust correctly for exposure/sharpness/composition before moving onto tones/moods/styles.
Producing
This is the final step where I actually prepare each edited photograph for release either by my website or onto my Instagram @HiddenCityPhotos. I have to consider cropping limits, photo groups, and more for each app/website/device I’ll be posting my image to.
Now, this is a very barebones outline of my general workflow (and I’m sure many photographers might agree or disagree about the order or specifics or even missing/alternative steps), but I hope it gives some insight into how I approach a photowalk and the editing sessions, thereafter.
Closing Thoughts
In summary, I hope I was able to give a little more insight into the world of macro photography and perhaps inspire someone else to “take the leap” and start having fun with macro styles. Thankfully, it’s fairly inexpensive to get started with the very basics, and while there are some caveats to shooting macro, specifically, I think it’s a fun way to explore your abstract and story-telling skills! You can test yourself against some difficult/unusual subjects in ways you wouldn’t have thought of before and you might even find yourself shooting your typical subjects differently as a result!
So good luck, and I hope to see you all around very soon! Perhaps, in a future post, I’ll start exploring some techniques I use when I’m out shooting my own macro photography.
Until next time, happy shooting!
James Z.
Open for [Small] Business
Hey everyone! This is my first time engaging an audience with this kind of tool and I thought that there would be no better place to write my first post than on my very own website! First, I should introduce myself since my assumption is that you're reading this to learn more about me and my photography.
My name is James Zygmont, I'm 22 years old (as of writing this post), and I'm a regional photographer in Fairfield, Connecticut. I haven't always been a photographer, but within the last several years, I've discovered that there is nothing that does a better job of getting my creativity flowing than a camera, a backpack, and a city full of stories.
My goal for this blog is to explore, in writing, my experiences and processes in my everyday shooting so that you, as a reader, are able to find something interesting or valuable that might help you when you're out with your own camera!
Right now, I'm experimenting and trying to discover the techniques and subjects that interest me the most. At this very moment, I would say that the kind of photography that excites my artistic side the most, is macro photography. Mainly, for the abstract story-telling capabilities that macro photography has to offer. Every photograph tells a story, but with macro photography, I'm able to tell the everyday stories that go unnoticed all around us! It's so much fun to point my lens at the world and twist, turn, pinch, pull, and jumble it around.
It's a great way to discover a different side of the things that surround you in your day-to-day life. Here's a small example that you can try yourself; put your pointer fingers and thumbs together in the shape of a rectangle (just like a movie director looking for her perfect shot). Then, pick an object in the room that you're in. Focus only on that one object and move your makeshift viewfinder along each corner and surface and notice that, as the composition changes, so does the story you're telling about this particular object and its place in the room. The space around it changes, creating different perspectives of how this object blends in with its environment. Sometimes it gets entirely isolated, contrasting boldly against the rest of the walls and furniture, and other times, it just blends right in, as if it's just a piece set against a more imposing backdrop.
I love this about macro photography because it takes this practice to the very extreme. Instead of just narrowing your field of view, you also abstract a lot more detail for the viewer. You get the chance to erode parts of the room and replace them with your own message. Now, a large part of this, at least for me, is keeping a piece of that original object, or idea, intact. I do my best to avoid influencing the subject directly and instead opt to change MY perspective when I go out shooting macro scenes.
I think the biggest thing that helps me, however, is just taking lots and lots of photos with all kinds of exposures and angles. You need to give yourself the time to mess up and do a lot of trial-and-error. You have to move around and bend your arms in all sorts of ways to see what possibilities there are besides your default view. There might be something AMAZING if you just walk to the side by a foot or two. You might even ask some of the people around you to see what they see to gain yet another perspective! There are so many options when it comes to this style of shooting, it's absolutely great!
Last, but definitely not least, don't forget that you're doing this for yourself. Photograph subjects that YOU enjoy. Move around in ways that YOU feel the most comfortable. Engage with your surroundings in the way that YOU see best. I would like to encourage you to move around, but start out in any way that makes sense to you.
Phew! That was a lot of writing for my first post. I'm sure I could have narrowed it down to a much simpler "Hello" and been half as satisfied, but I'm sure I'll be writing a lot more in detail about my exact processes and inspirations. I hope I was able to give you a small glimpse of what gives me the energy to get out to the city and shoot for hours on end and I hope that you were able to get something valuable out of reading this.
I'd like to end this post with a question, as well as get some insight as to what some of you guys feel about this style of writing. What kind of experience do you have with macro photography? Are you a master of the mini? Or is this the first time you're reading about something like this? Leave a comment or feel free to email me directly.
Anyway, this is just the first of hopefully many posts so I want to also thank you for your support and I hope you have a great time shooting!
Best of luck,
James