
Hey everybody! Zig here!
Today I’d like to showcase an image I took on my recent trip to Mianus River Park and talk a bit about my process of retouching and focus stacking when shooting macro photography. It all starts out with a series of images and in this case, it’s a series of photographs I captured of a mushroom which I found growing on the side of a fallen log. Take a look at the images and notice how each has a different portion of the mushroom in focus, starting from the foremost edge of the mushroom and moving all the way to the back.


To capture these, I mounted my Nikon Z6 on a tripod, composited the image, and then used the “Focus Shift” feature that is built into the Nikon Z6. The way that focus stacking works is that focus on the foremost part of the object you want to photograph, take a photo, move the focus towards to the back while overlapping your first photograph slightly, and then repeating the process until you have captured enough “slices” that each contain a different piece of focus for the target image. The focus shift feature in the Nikon Z6 automates this process and made it very quick and easy to get the results that I wanted.
After I’ve taken the photos, I import everything into Lightroom and make all my processing adjustments to every image in the stack before exporting the full-sized JPEG files and opening them in Photoshop. What I specifically do is open the first image in the stack in Photoshop and then import and rasterize every other image in the stack into that same session. At this point, my layers look a bit like this;
After this step, I select every layer in the layers tab and click on Edit > Auto-Align Layers and then choose to let Photoshop decide on the best way to automatically align them.
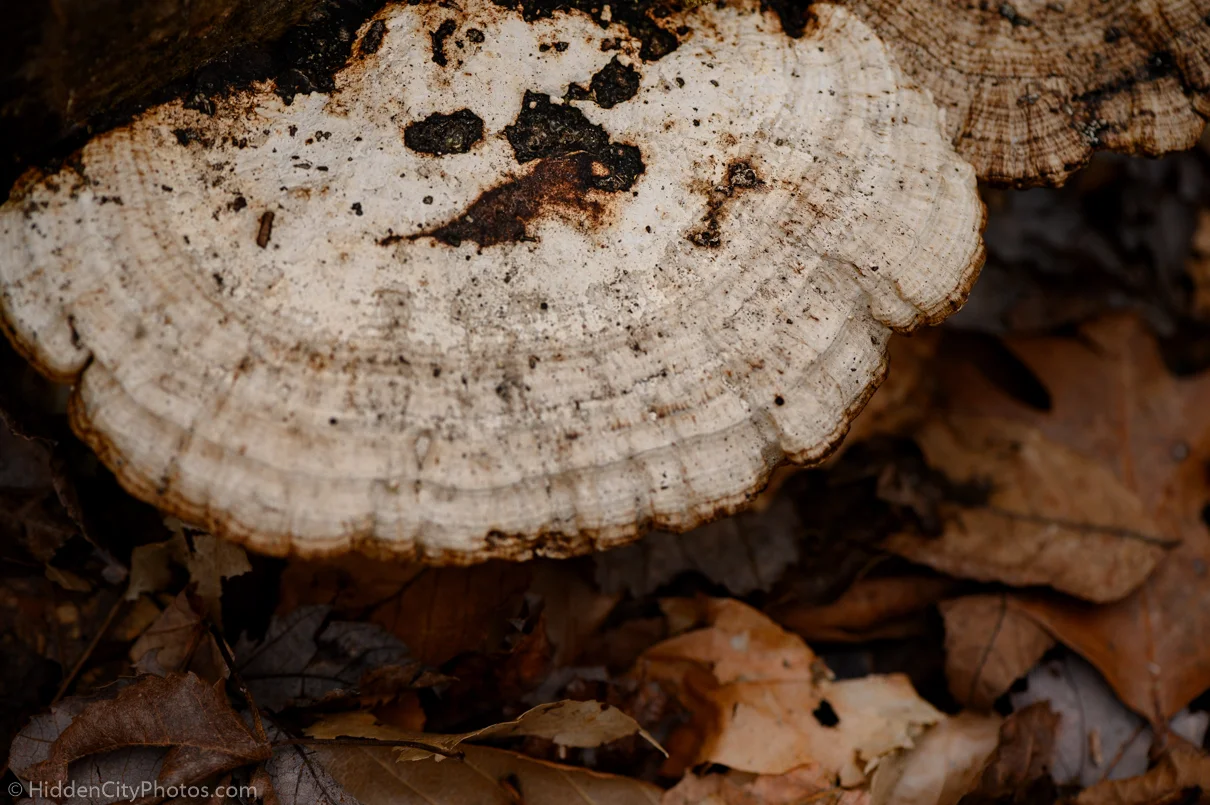
Once Photoshop aligns every layer, I then go in and make any additional adjustments like the selective removal of focus from some of the layers or, if there are many images in the stack, more extremely out-of-focus areas to prevent potential ghosting when I merge everything in the next step. After I’m content with the layers in the stack, I then click Edit > Auto-Blend Layers and let Photoshop automatically merge everything together. The final image looks like this, with the expected result being that everything is in focus.
This is a bit of a simplified breakdown of my process, but I hope that it gives the structure you would need to be able to repeat a similar process or implement it into your own workflow. I am always adjusting and improving the process as I learn some of the pit-falls of shooting macro photography and I am always open to hearing suggestions about how you might change or alter this style of processing and stacking!
I’ve only recently started to integrate this technique into my routine and I’ve already seen examples of photos where I would not want to keep everything in focus. However I think that focus stacking, and practicing taking multiple images with different depths of field, allows me to have the freedom and control I’m looking to get with my macro photography. It helps me capture the crisp, sharp edges that I like, as well as selectively keep things out-of-focus when I want to. Anyway, that’s all I have for today. I hope you have a great week shooting and I also hope that I was able to give a little insight into how I produce some of my macro images. I’ll see you all next week in another episode of the Shutter Button Podcast where I’ll be talking about formal education vs. deliberate practice, and my experience with finding a balance between both.
Thanks and all the best,
- Zig